How to Reduce a Photo to a Specific File Size (Not Just Compress It)
A quality slider does not know what file size it will produce until after the fact. Here is how compressing to an exact KB target actually works, and how to pick the right one.

You drag the quality slider down, save the file, check the size. Still too big. Drag it down further, save again, check again. Ten minutes later you're somewhere around the right size, but you had to guess your way there, and the photo looks noticeably worse than it needed to for that final number.
This is the wrong way to hit a specific file size, and it's how most people do it because most compression tools were never built to target an exact number in the first place. A quality slider controls quality. It doesn't know or care what file size that produces until after the fact. Getting to a specific KB target on the first try needs a different approach entirely, one that works backward from the size you want rather than forward from a quality guess.
Why "Just Compress It" Doesn't Get You an Exact Size
Every lossy image format, JPEG and WebP included, compresses using a quality parameter, typically a number from 0 to 100. The natural assumption is that this number behaves predictably, that quality 90 produces a file roughly 10% smaller than quality 100, and quality 50 is about half that again. It doesn't work that way.
The relationship between quality and file size is sharply non-linear. Dropping from quality 100 to quality 90 can shrink a JPEG by 50 to 70% with no visible difference at all, because JPEG's compression algorithm discards redundant data that the human eye barely registers at high quality settings. Push further, from 90 down to 70, and the size keeps falling but now real detail starts disappearing along with it. The curve is steep at the top and flattens out lower down, which means the same 10-point drop in quality can mean a massive size difference in one range and barely anything in another.
This is exactly why guessing at a quality percentage to hit a specific KB target wastes time. You're not just picking a number, you're trying to find one specific point on a curve that behaves differently depending on where you start.
How Compression to an Exact Size Actually Works
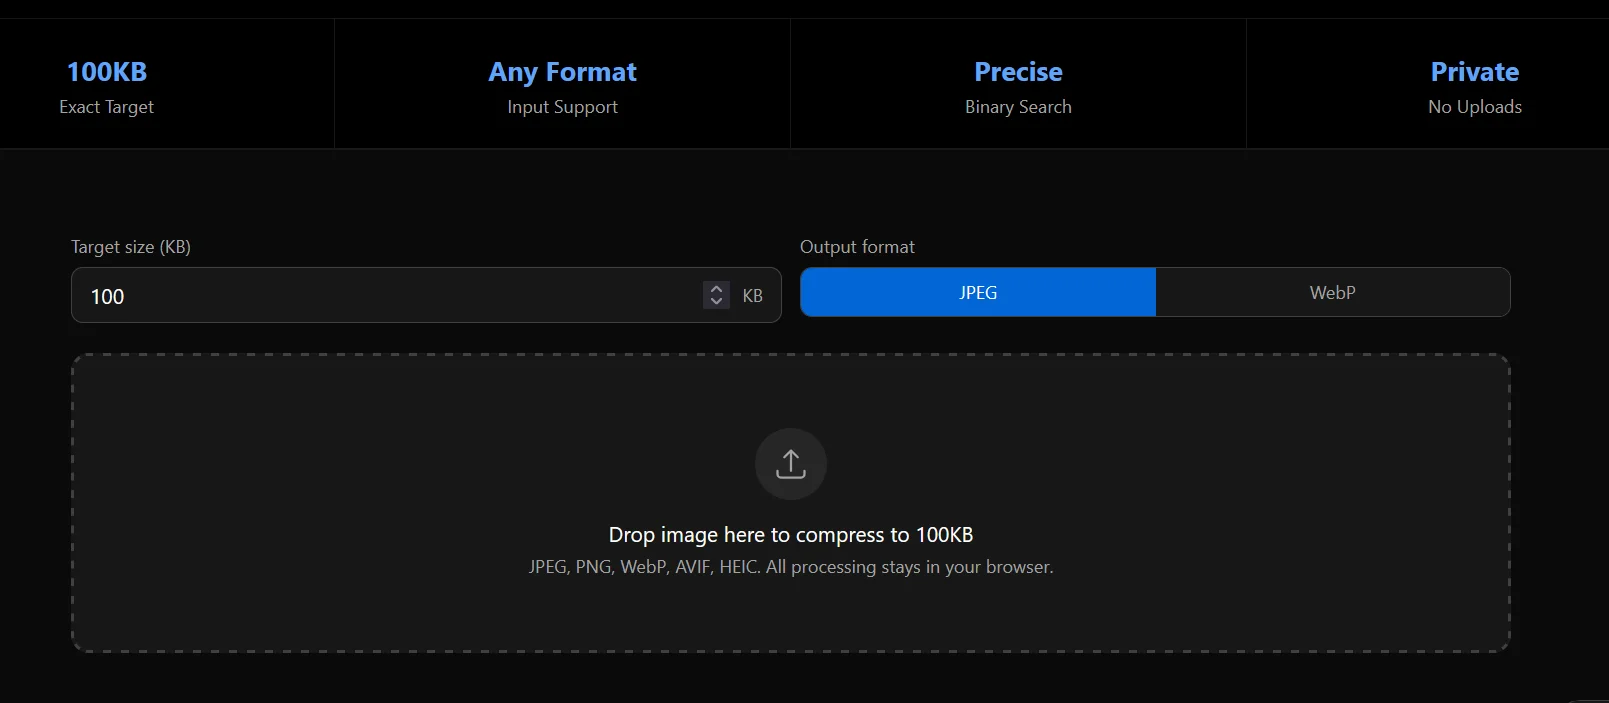
The tools on this site work in the opposite direction from a quality slider. Instead of you picking a quality and hoping the size lands where you need it, you tell the tool your target size, and it works backward to find the highest quality that still fits.
This is done with a binary search over the quality parameter, a well-documented approach in image processing, described in patent filings on JPEG size targeting going back over a decade. The tool starts partway up the quality range, checks the resulting file size, and depending on whether that's above or below your target, moves the quality up or down and checks again. Each pass narrows the gap, and within six to eight iterations it converges on the highest quality setting that still lands under your target size.
The result is always the best possible quality for the size you asked for, not an arbitrary reduction. If the tool can reach your target at quality 78, it stops there rather than continuing to quality 40 just because a lower number feels safer.
There's a second layer to this for the cases where quality reduction alone isn't enough. If even the lowest usable quality setting still produces a file larger than your target, which happens with very high-resolution source images or an unusually small target, the tool also scales down the image's pixel dimensions and re-checks. This keeps the output clean rather than pushing quality so low that visible blocky artifacts appear.
Exactly vs Under: Two Different Targets
You'll notice two different families of tool on this site, and they solve slightly different problems. Pages like compress to 100KB or compress to 30KB target that number as closely as possible, giving you the best quality that still fits at or just under the stated figure. Pages like compress under 100KB or compress under 50KB work the same way underneath, but frame the target as a ceiling with intentional headroom, useful when a portal's stated limit is a hard cutoff and you'd rather land comfortably below it than risk sitting right at the edge.
In practice both use the identical compression tool, CompressToSizeConverter, just with a different default number and a different way of thinking about the result. If your portal says "under 100KB," either page gets you there. If it says "exactly 100KB or smaller," the exact-size framing matches the requirement more directly.
Choosing the Right Target for Your Situation
Different KB targets map to genuinely different use cases, and picking the right one saves you a round trip if your first guess turns out too strict or too loose.
| Target | Typical use |
|---|---|
| 10KB | Signature scans, tiny profile avatars |
| 20KB | Signature uploads, some strict exam portals |
| 30KB | State exam registration, scholarship portals |
| 50KB | Passport and visa photos, most government ID portals |
| 75KB | Scholarship applications, university portals |
| 100KB | Job applications, general online forms |
| 150KB | Higher-resolution portal photos |
| 200KB | General form uploads, some CMS platforms |
| 250KB | Web publishing, blog featured images |
| 300KB | Higher-quality web images |
| 400KB | Print-adjacent digital submissions |
| 500KB | Email attachments, cloud upload limits |
| 750KB | High-resolution photo sharing |
| 1MB | Email default, CMS uploads |
| 2MB | Single high-quality email attachments |
| 5MB | Large batch or archival compression |
If your portal or platform gives you a maximum but doesn't require an exact number, the general rule is to pick the largest target that still clears the limit. A larger target always means better retained quality, so there's no advantage to compressing tighter than you have to.
What Happens When Your Target Is Too Small for the Source Image
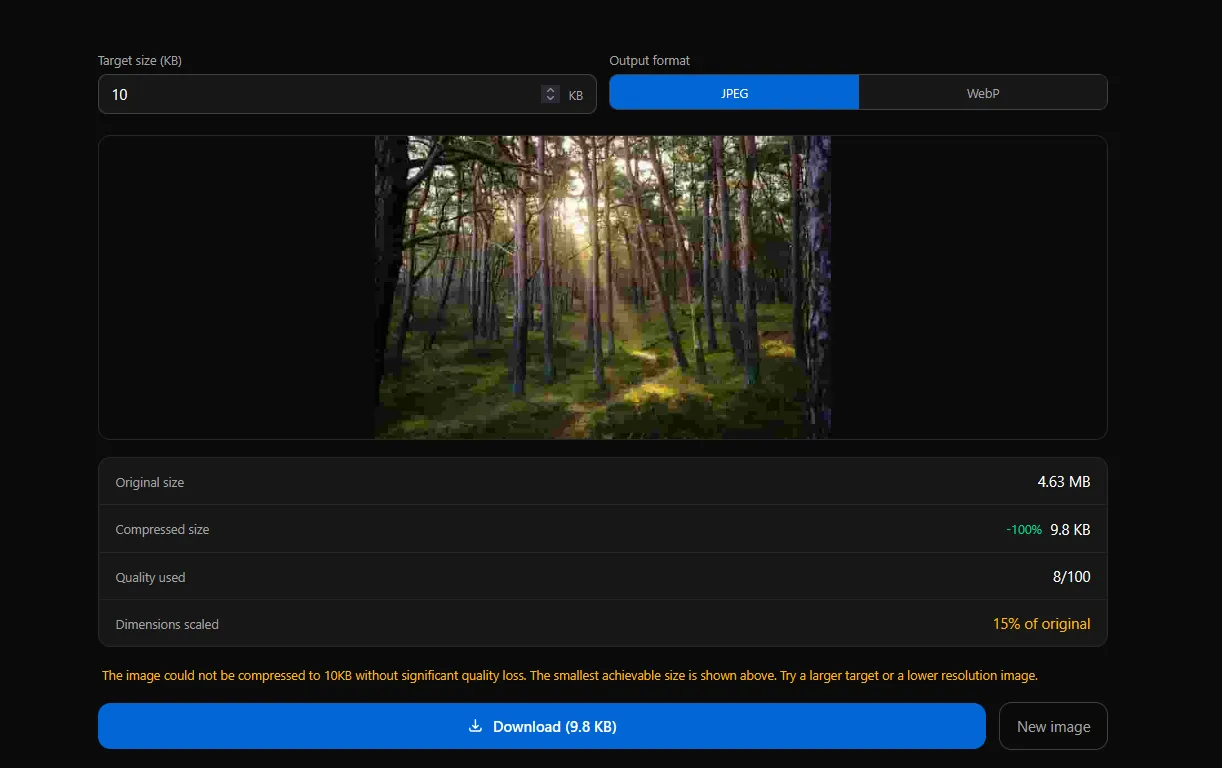
Every so often a target size genuinely can't be reached without a quality drop severe enough to look bad, and it's worth knowing what that looks like before it surprises you. This tends to happen with two kinds of source image: something already very high resolution being squeezed into a very small target like 10KB or 20KB, or a source image that's unusually detailed and complex, like a busy scanned document, which compresses less efficiently than a simple portrait photo against a plain background.
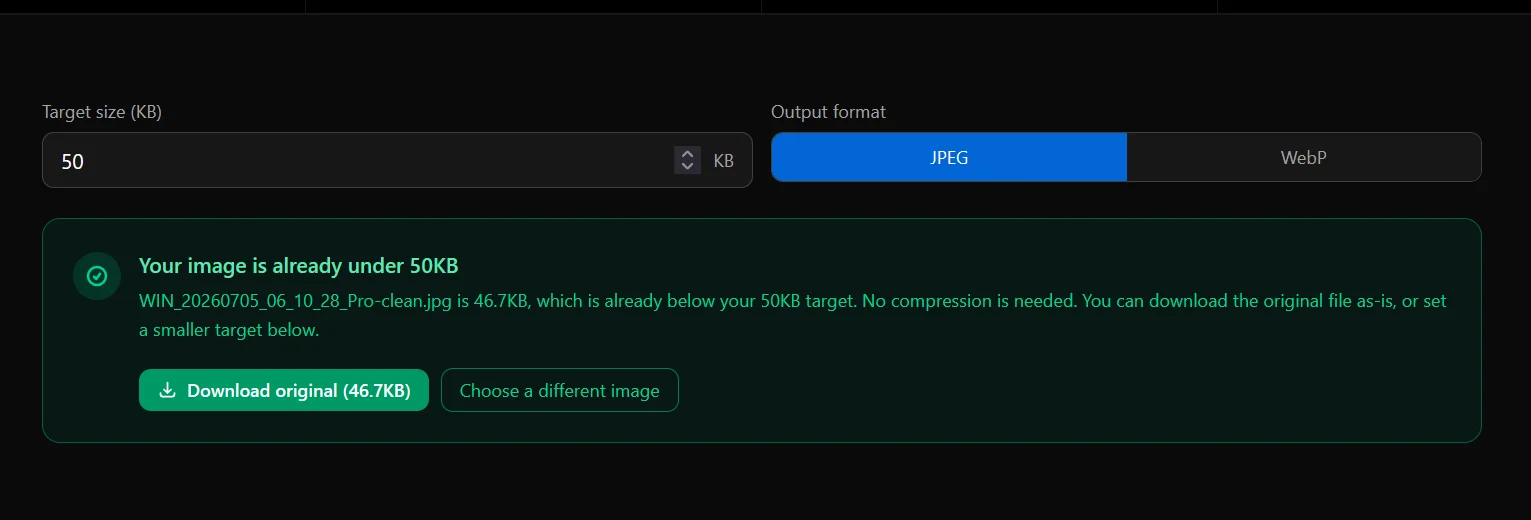
When this happens, the tool tells you directly rather than silently handing back a blurry file. It shows the smallest size it could actually achieve, and you can decide from there whether to accept a slightly larger target, or start from a lower-resolution source image if one is available. On the flip side, if your source image is already smaller than the target you set, the tool flags that too, since there's nothing to compress and downloading the original as-is preserves more quality than running it through the pipeline unnecessarily.
Step-by-Step: Reducing a Photo to a Specific File Size
Pick the tool page that matches your target, or start from compress to 100KB and adjust the number field if your exact figure differs. Every target-size page runs the same underlying tool, so you're not learning a new interface each time.
Drop your photo into the upload area. JPEG, PNG, WebP, AVIF, and HEIC are all accepted as input, which matters if you're starting from an iPhone photo, since HEIC files need converting before most portals will accept them regardless of size.
Choose your output format. JPEG is the safe default for almost any portal or form, since it's universally accepted where WebP occasionally isn't on older systems. Set the exact target size in the KB field if the page's default doesn't match your requirement.
Once the result appears, check the compressed size against your requirement, along with the quality figure shown, which tells you how much headroom was used. If the tool had to scale the image's dimensions to hit your target, that's shown too, so you know exactly what changed before you download and submit the file.
Common Mistakes That Cause Rejection Even at the Right Size
Hitting the exact KB number solves the most common cause of a rejected upload, but a few other issues show up often enough to be worth checking before you submit.
Format mismatches are the most frequent one. A file that's precisely the right size in PNG or HEIC can still get rejected if the portal only accepts JPEG, which is common on older government and institutional upload systems. The passport photo compression guide covers format requirements in detail if you're not sure which format your destination expects.
Minimum size requirements catch people off guard occasionally, since most people only think about maximum limits. A handful of portals specify a size range rather than just a ceiling, rejecting a file that's compressed too aggressively along with one that's too large. If your upload keeps failing even at a size well under the stated maximum, check whether there's a stated minimum you've dropped below.
Pixel dimensions get checked independently of file size on some stricter portals, particularly passport and visa systems built around ICAO's biometric photo standard. A photo can be exactly the right KB size and still fail if its pixel dimensions or head-to-frame ratio don't match what the portal expects.
Frequently Asked Questions
Why does the same quality setting produce different file sizes on different photos? File size at a given quality depends heavily on how much visual detail and complexity the image contains. A plain portrait against a flat background compresses far more efficiently than a busy, detailed scene at the identical quality setting, which is why there's no single quality number that reliably hits a specific KB target across different photos.
Is compressing to an exact size worse for quality than just picking a quality percentage? No, it's the opposite. Working backward from a target size finds the highest quality that still fits, which by definition gives you better quality than picking a conservative quality number in advance and hoping it lands under the limit.
What's the difference between compressing to exactly 100KB and compressing under 100KB? Functionally very little. Both use the same underlying compression approach. The under-target pages are framed around leaving headroom below a stated ceiling, which is useful phrasing when a portal states a strict maximum rather than an exact figure.
Can I compress a batch of photos to the same target size at once? Each tool page here processes one image at a time, running the full binary search independently for each file so that photos with different original complexity all reach the same target size rather than being scaled by a single shared setting.
Does compressing to a very small target like 10KB always look bad? Not necessarily, and it depends heavily on the source image's resolution and content. A simple, well-lit portrait photo can often reach 10 to 20KB with acceptable clarity for identification purposes, while a highly detailed or high-resolution scan may need dimension scaling to get there cleanly.
Try the Free Compress-to-Size Tool
Every target size covered in this guide runs the same tool: pick your KB target, drop in your image, and get back the highest quality version that fits, with nothing uploaded to a server at any point. Start from compress to 100KB for the most common target, or jump straight to compress to 50KB if you're working on a passport or visa photo specifically.
If your specific use case has its own dedicated page, compress for job applications, compress for email, and compress for passport photos all apply the right default target automatically so you don't have to look up the number yourself.
Related articles
How to Compress Image to 100KB (Step-by-Step)
Phone cameras produce 3 to 12MB photos by default. Most portals cap uploads at 100KB. Here is exactly how to bridge that gap without destroying quality.
ReadWhy Is My Image File So Large and How to Fix It
Your phone takes a photo and it's already 8MB. We break down exactly what makes image files large and the fastest ways to shrink them without losing quality.
ReadHow to Reduce Image File Size Without Photoshop
You don't need Photoshop to shrink image files. Six practical methods that work without installing anything or paying for software.
Read