How to Make a PNG File Smaller (Without Losing Quality)
Lossless optimization saves 15 to 25%. Converting to WebP, AVIF, or JPG saves far more. Here is which method actually fits your PNG.

You right-click a screenshot, hit save, and it's 4MB. Or a design export from Figma comes out at 8MB for what's basically a logo on a white background. PNG has a reputation for doing this, and it's not really PNG's fault. It's doing exactly what it was built to do. The problem is that what it was built to do isn't always what you need.
There are four real ways to make a PNG smaller, and they're not interchangeable. Two of them keep the file as a PNG. Two of them convert it to something else entirely. Picking the wrong one for your situation either barely helps or throws away something you actually needed, like transparency. Here's how PNG compression actually works, which method fits which situation, and how to do each one in your browser with nothing uploaded to a server.
Why PNG Files Get So Large in the First Place
PNG uses lossless compression, specifically a filtering step followed by DEFLATE, the same general-purpose algorithm used inside ZIP files. Lossless means every single pixel is preserved exactly. Nothing is approximated, nothing is discarded. That's genuinely valuable for some content and genuinely wasteful for other content, and the difference comes down to how much natural variation is in the image.
A flat logo with a handful of solid colors compresses well under DEFLATE, because there's very little variation between neighboring pixels for the algorithm to work with. A photograph is the opposite case entirely. Every pixel differs slightly from the ones around it because of natural texture, lighting, and sensor noise, and DEFLATE has almost nothing repetitive to compress. That's why a photo saved as PNG can be five to ten times larger than the same photo saved as JPEG. You're storing nearly all of the raw pixel data either way, PNG just wraps it in a lossless format that was never built for that kind of content.
Screenshots sit in an odd middle ground. They have large flat areas, but also anti-aliased text and fine UI detail, which pushes file sizes up more than a simple logo but usually stays well under a photograph's size.
Two Ways to Make a PNG Smaller
Every method for shrinking a PNG falls into one of two categories, and picking between them is really the first decision that matters.
Lossless optimization keeps the file a PNG and changes nothing about how it looks. It works by re-encoding the same pixel data more efficiently, finding better filter choices and compression parameters than whatever tool originally created the file. Typical savings sit around 15 to 25%, occasionally reaching 40% depending on how inefficiently the original was encoded. This is the right choice when you need to keep the PNG format specifically, usually because of transparency or because you plan to edit the file again.
Format conversion changes the file to a different format entirely, either a lossy format like JPEG, or a modern format like WebP or AVIF that supports transparency at a much smaller size than PNG ever could. This is where the big reductions happen, often 50 to 80% smaller, but it means the output is no longer technically a PNG file.
Method 1: Lossless PNG Optimization (Keep It a PNG)
If you need to keep the file as a PNG, whether for compatibility with older software or because your workflow specifically requires it, lossless optimization is the only option that doesn't change the format. Go to the homepage and drop your PNG into the dropzone. The compression workspace opens on the same page with your image loaded.
In the format dropdown, PNG (OxiPNG) keeps the output as a genuine PNG file. Notice that the quality slider becomes disabled and shows "Lossless" instead of a percentage. That's expected: OxiPNG re-encodes the file more efficiently without touching a single pixel, so there's no quality trade-off to adjust.

The realistic expectation here matters. OxiPNG typically saves 15 to 25% off the original file size, sometimes up to 40% if the PNG was exported by software that didn't optimize it well in the first place. That's a genuine improvement with zero quality cost, but it's not going to turn an 8MB PNG into an 800KB file. If you need a bigger reduction than that and the format itself isn't fixed, one of the conversion methods below will get you much further.
Method 2: Convert to WebP (Best All-Around Choice)
WebP is the best default choice for most PNGs that need to be genuinely smaller, because it keeps full transparency support while compressing far more efficiently than PNG's lossless approach ever could. Go to the PNG to WebP converter and drop your file in.
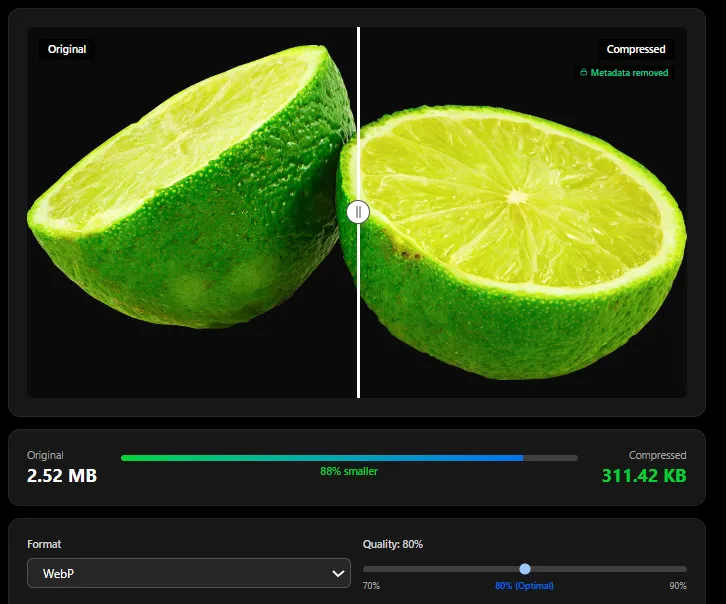
At the default quality of 82%, WebP typically comes out 26% and above smaller than PNG at equivalent visual quality for graphics, and considerably more than that for photographic content, since WebP handles complex color gradients far better than DEFLATE does. Transparency, semi-transparent shadows, and layered graphics all carry over correctly. Browser support has sat above 97% globally since 2020, so this is safe to use on a public website without a fallback for the overwhelming majority of visitors.
Method 3: Convert to AVIF (Maximum Compression)
If WebP still isn't small enough, AVIF goes further. Go to the PNG to AVIF converter and drop your file in.
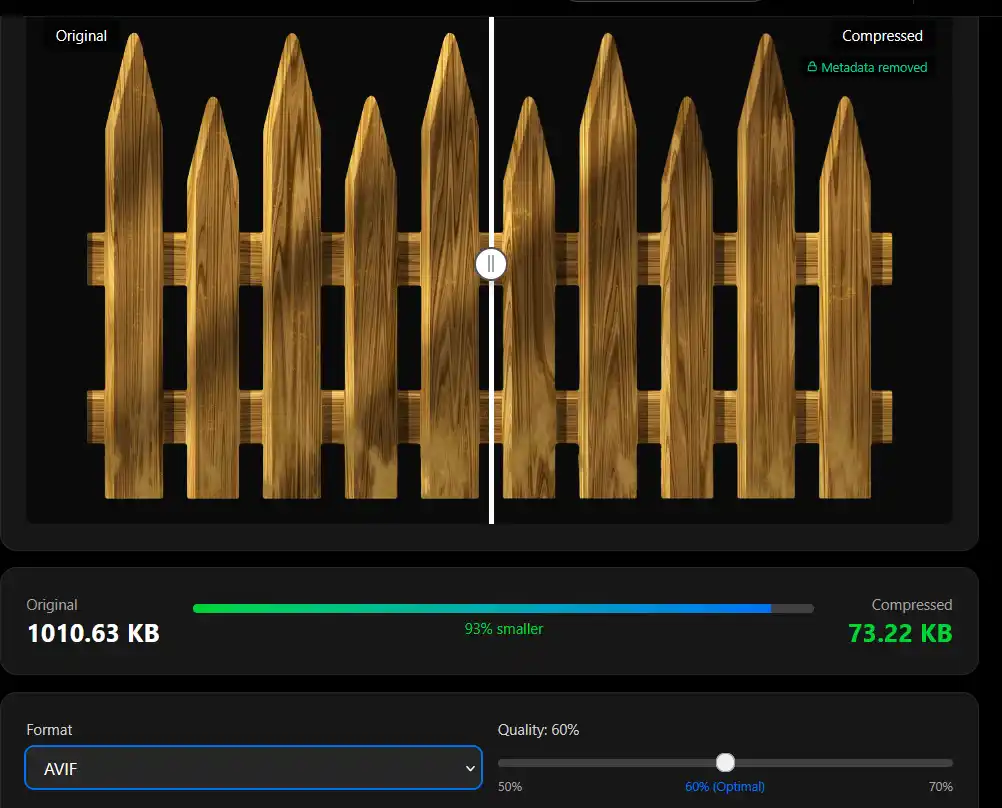
AVIF typically compresses 60 to 90%+ smaller than PNG while keeping full transparency, since it encodes the alpha channel using the same AV1-based compression as the color data rather than treating it separately the way PNG does. The tradeoff is encoding speed. AVIF encoding in the browser is noticeably slower than WebP or PNG, often 5 to 30 seconds per image depending on your device, because the AV1 codec is more computationally intensive. For a handful of images this is a minor wait. For a large batch, WebP is the faster option if the extra compression isn't critical.
Method 4: Convert to JPG (Maximum Compatibility, No Transparency)
If your PNG is a photograph with no transparent background and you need the widest possible compatibility, including older software and email clients, converting to JPG is the right call. Go to the PNG to JPG converter and drop your file in.
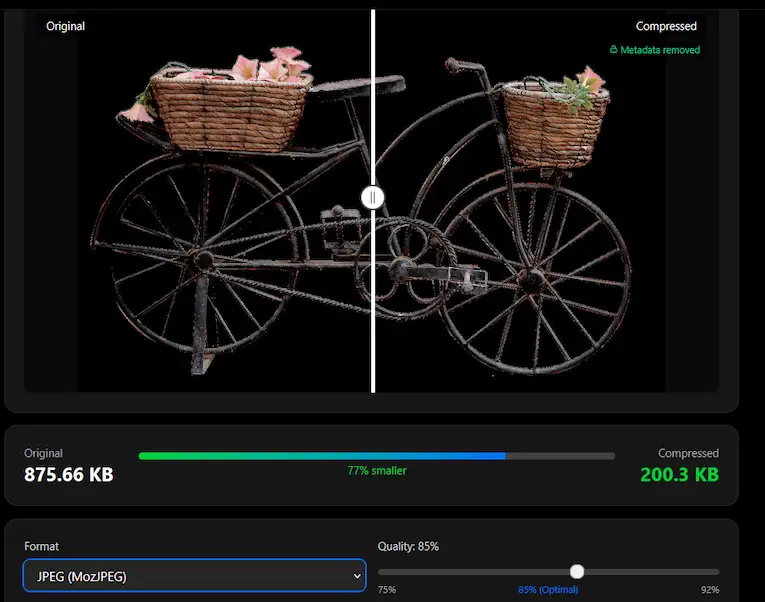
At the default quality of 85%, a photographic PNG typically shrinks by 60 to 80%, with a 3MB PNG photo often becoming a 500 to 700KB JPEG that looks identical at normal viewing sizes. The one thing to know before choosing this route: JPEG has no transparency channel at all. Any transparent pixels in your PNG become solid white in the output. If your image has a transparent background, a logo cutout, or any layered graphic element, this method will visibly break it. Use WebP or AVIF instead in that case.
Which Method Should You Use?
The decision comes down to two questions: does the image need transparency, and does the format itself need to stay PNG.
If transparency is required and the format can change, WebP is the safest default, with AVIF as the step up when you need maximum compression and can tolerate slower conversion. If transparency is required and the format must stay PNG specifically, lossless optimization through the homepage compressor is your only option, and the expectation should be a modest 15 to 25% reduction rather than a dramatic one.
If the image is a photograph with no transparency, converting to JPG gives the biggest reduction and the widest compatibility. If it's a screenshot or flat-color graphic with no transparency, either JPG or WebP works, though WebP tends to handle sharp edges and text more cleanly than JPEG's compression method, which can introduce faint ringing artifacts around hard boundaries.
Other Ways to Shrink a PNG
Two additional levers affect PNG file size regardless of which compression method you choose, and they're worth checking before you assume a file can't get any smaller.
Pixel dimensions matter directly, since a PNG's size scales with how many pixels it actually contains. A screenshot captured at a Retina display's native resolution, for instance, is often two to four times larger than it needs to be if the image is only ever displayed at a smaller size on the page. If your source image is larger than it needs to be for its actual use, resizing it to the dimensions it will actually be displayed at reduces the file size proportionally, on top of whatever compression method you apply afterward.
Color depth is the other lever, and it's worth understanding even though it's a more specialized technique. A full-color PNG stores up to 16.7 million possible colors per pixel. Many images, especially UI screenshots, icons, and simple graphics, don't actually use anywhere near that many distinct colors, and reducing the image to an indexed palette of 256 colors or fewer can cut file size by 60% or more on that kind of content with no visible difference, since the eye can't distinguish millions of unused color slots anyway. This technique changes pixel values slightly rather than being purely lossless, which is why it's treated as a separate, more aggressive step rather than folded into standard lossless optimization.
Step-by-Step: Making Your PNG Smaller
Decide first whether transparency matters and whether the format needs to stay PNG. This single decision determines which of the four methods above applies.
For a lossless PNG-to-PNG reduction, drop your file on the homepage. The compression workspace opens there automatically. Select PNG (OxiPNG) in the format dropdown and download. Expect a 15 to 25% reduction with zero quality change.
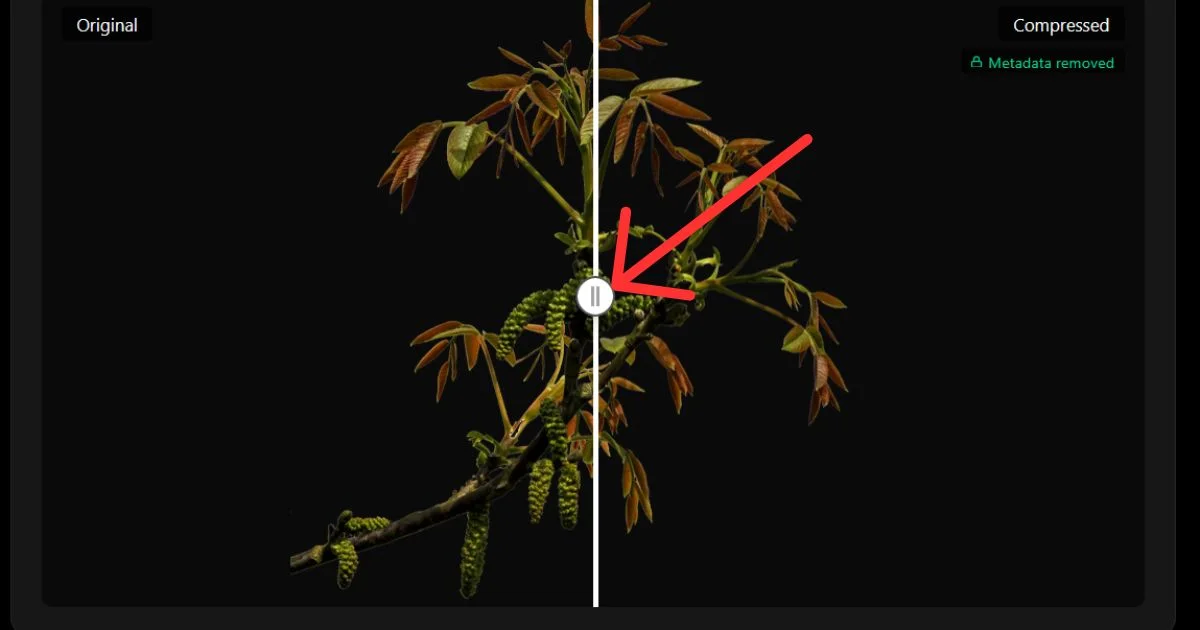
For a format conversion, pick the destination based on your transparency and compatibility needs from the section above, drop your file into the matching converter, adjust the quality slider if the default doesn't fit your needs, and download the result.
Whichever route you take, check the before and after comparison (From the picture above, you can slide the line in the middle to the left to see the full compressed image quality and when slide to the right, you will see the full original image quality) the tool shows you before committing to the smaller file, particularly if you went with JPG and the source image had any transparent areas, since that's the one case where the visual result changes in a way you'll want to confirm before using it.
Common Mistakes to Avoid
Converting a transparent PNG to JPG without checking the result first is the most common mistake, since the transparent areas silently become solid white and the problem often isn't noticed until the image is already published somewhere.
Expecting lossless optimization to dramatically shrink a photographic PNG is another frequent letdown. OxiPNG's 15 to 25% savings apply to any PNG, but a PNG that's large because it's a photograph rather than because it was poorly encoded won't shrink much further while staying lossless. That's a format-choice problem, not an optimization-settings problem, and the fix is converting to JPEG or WebP rather than tweaking the PNG encoder further.
Compressing at a much higher resolution than the image will ever actually be displayed at wastes both file size and processing time. Checking the actual display dimensions before choosing a compression method catches this early rather than after the file's already been shrunk and re-uploaded somewhere.
Frequently Asked Questions
Can I make a PNG smaller without losing any quality at all? Yes, through lossless optimization, which typically saves 15 to 25% by re-encoding the same pixel data more efficiently. This is different from format conversion, which can save much more but does involve some quality trade-off, or removes transparency entirely in the case of JPEG.
Will converting my PNG to WebP or AVIF look different? At the default quality settings on both converters, the difference is not visible at normal viewing sizes. Transparency, gradients, and fine detail all carry over correctly. Very close inspection at high zoom can occasionally reveal subtle differences around complex transparent edges, more so with AVIF at lower quality settings.
Why is my screenshot PNG so much bigger than a similar-looking photo? Screenshots often contain sharp UI edges and anti-aliased text alongside flat color regions, which compress less efficiently under PNG's lossless algorithm than either a simple flat logo or, counterintuitively, sometimes less efficiently than a JPEG-compressed photo, depending on the specific content.
Does resizing a PNG before compressing help? Yes, meaningfully. File size scales with pixel count, so an image captured or exported at a higher resolution than it will ever be displayed at carries extra size that no compression method recovers. Resizing to the actual display dimensions first, then compressing, produces a smaller result than compressing at the original size alone.
Is my PNG uploaded to a server during any of this? No. Every tool covered here, the homepage PNG optimizer, and the WebP, AVIF, and JPG converters, all run entirely in your browser using WebAssembly. Your file never leaves your device at any point.
Try It Yourself
Start with the question of whether you need to keep the transparency and the PNG format. If yes, drop your file on the homepage and select PNG (OxiPNG) in the compression workspace for a genuine, lossless reduction. If the format can change, PNG to WebP is the best default for most cases, PNG to AVIF pushes compression further when you can tolerate slower conversion, and PNG to JPG gives you the smallest, most compatible file when transparency isn't needed at all.
For more on the tradeoffs between keeping every pixel exact versus discarding what the eye won't notice, the lossy versus lossless compression guide covers the underlying concept in more depth, and PNG vs WebP breaks down the format comparison further if you're deciding what to standardize on for an entire website.
Related articles
PNG vs WebP: Which Image Format is Better for Web Performance in 2026?
WebP lossless compresses 23 to 42% better than PNG according to Google's own published study, with the same transparency and zero pixel loss.
ReadLossy vs Lossless Compression: Understanding When to Use Each
Discover the key differences between lossy and lossless compression methods and learn which approach is best for your specific image optimization needs.
ReadHow to Reduce Image File Size Without Photoshop
Browser tools, built-in apps, format conversion, and resizing. Six practical methods that work without installing anything or paying for software.
Read