
How to Make a Contact Sheet: Free Online, Photoshop, Lightroom, Mac and Windows
Every photo on one numbered page, so picking favorites takes a minute. Here is the free browser method step by step, the steps in Photoshop, Lightroom, Bridge, Mac and Windows, and how to choose between them.

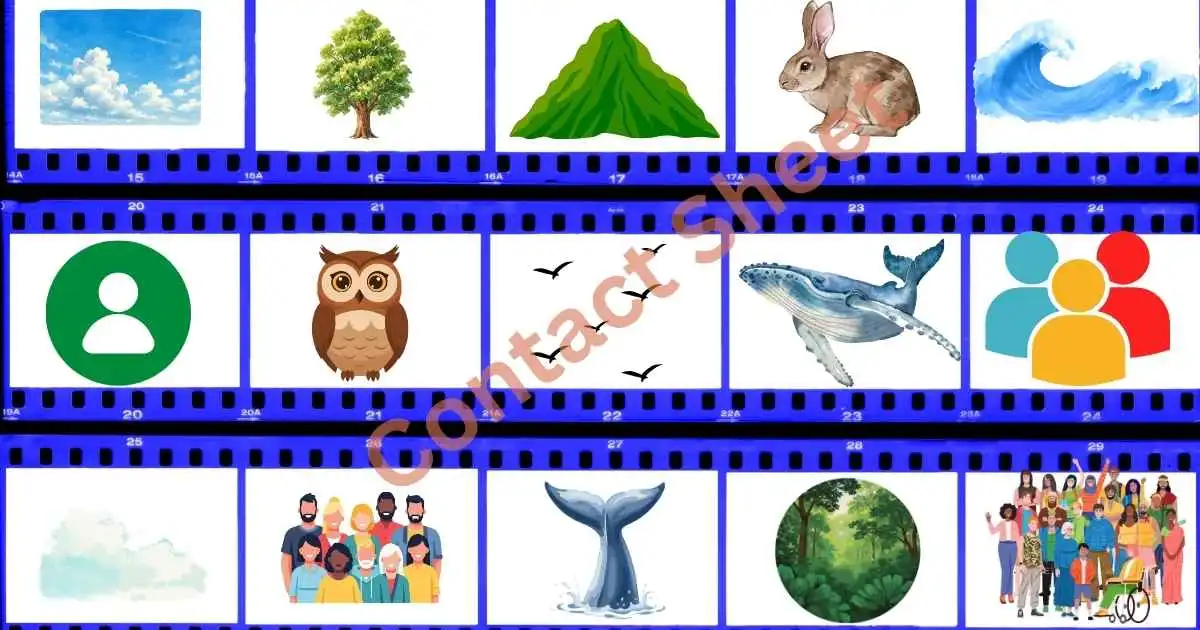
You've got 40 photos from a shoot and a client who wants to pick five. Or a folder of product shots that someone needs to sign off. Sending 40 separate files is slow for everyone, and nobody enjoys scrolling through a camera roll on a video call. A contact sheet fixes that: every photo on one page, numbered, so people can say "number 12 and number 31" and you know exactly what they mean.
The term comes from film photography. Photographers laid a whole strip of negatives directly on photo paper, in contact with it, and exposed them together. The result was a sheet of small, same-size prints of every frame on the roll. Today it's the same idea, built from digital files.
You can make one in a browser in about a minute, or with software you may already have: Photoshop, Lightroom, Adobe Bridge, Photos on a Mac, or Windows itself. This guide walks through each one, what it does well, and where it falls short, with a comparison table near the end if you just want the short answer.
What Makes a Contact Sheet Useful
A pretty grid isn't the goal. A useful contact sheet does three jobs.
- Every photo is shown in full. If thumbnails are cropped to squares, you can miss the detail that decides the pick, like a closed eye at the edge of the frame or a horizon that isn't level.
- Every photo can be identified. A number or file name under each thumbnail, so a reply like "I like 7 and 9" maps back to real files.
- It prints or shares cleanly. A PDF or image at a sensible size, at 300 DPI if anyone will print it.
Keep those three in mind when you compare the methods below, because that's where they differ most.
Method 1: Make a Contact Sheet Free Online (No Install)
This is the fastest route, and it works on a phone as well as a computer. The contact sheet maker on ImgTweak builds the whole sheet in your browser, so your photos aren't uploaded anywhere. There's no account, no watermark and no limit on how many photos you add.
Step 1: Add your photos
Open the tool and drop your photos onto the page, or tap Choose photos on a phone. JPG, PNG, WebP, GIF, BMP, AVIF, HEIC and TIFF all work, so iPhone photos go in as they are, without converting them first.
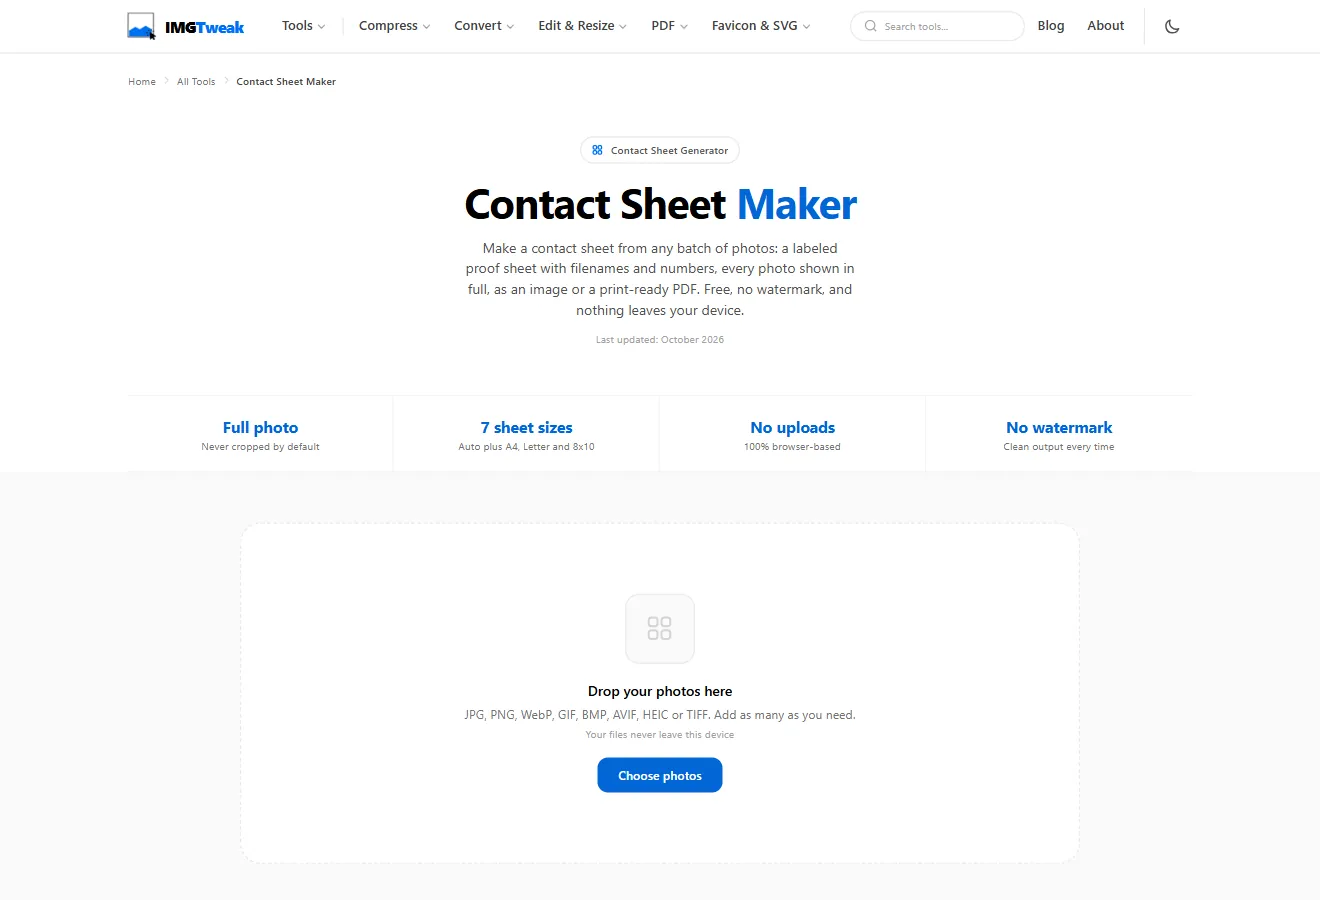
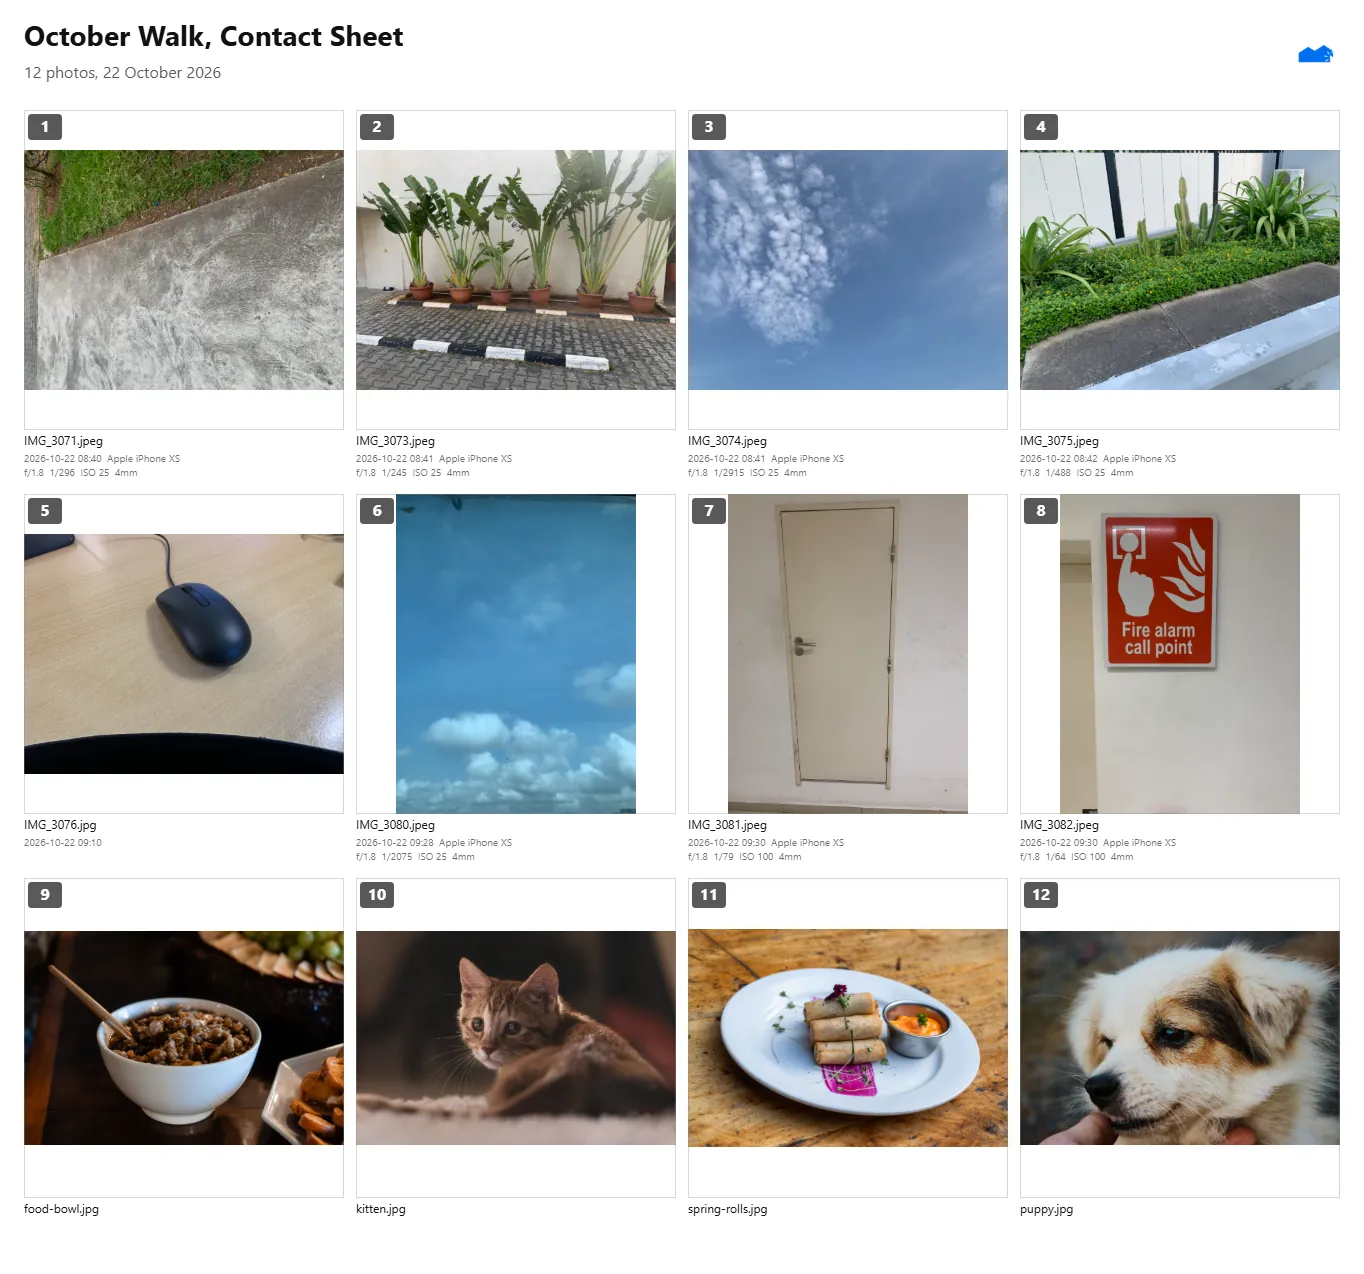
The editor opens with your photos in a list on the left, a live preview in the middle and the settings on the right. Drag thumbnails in the list to change the order, or sort by name, file size or date modified. Every photo is shown in full by default, letterboxed to fit its cell. Portrait and landscape shots sit side by side without anything cut off.
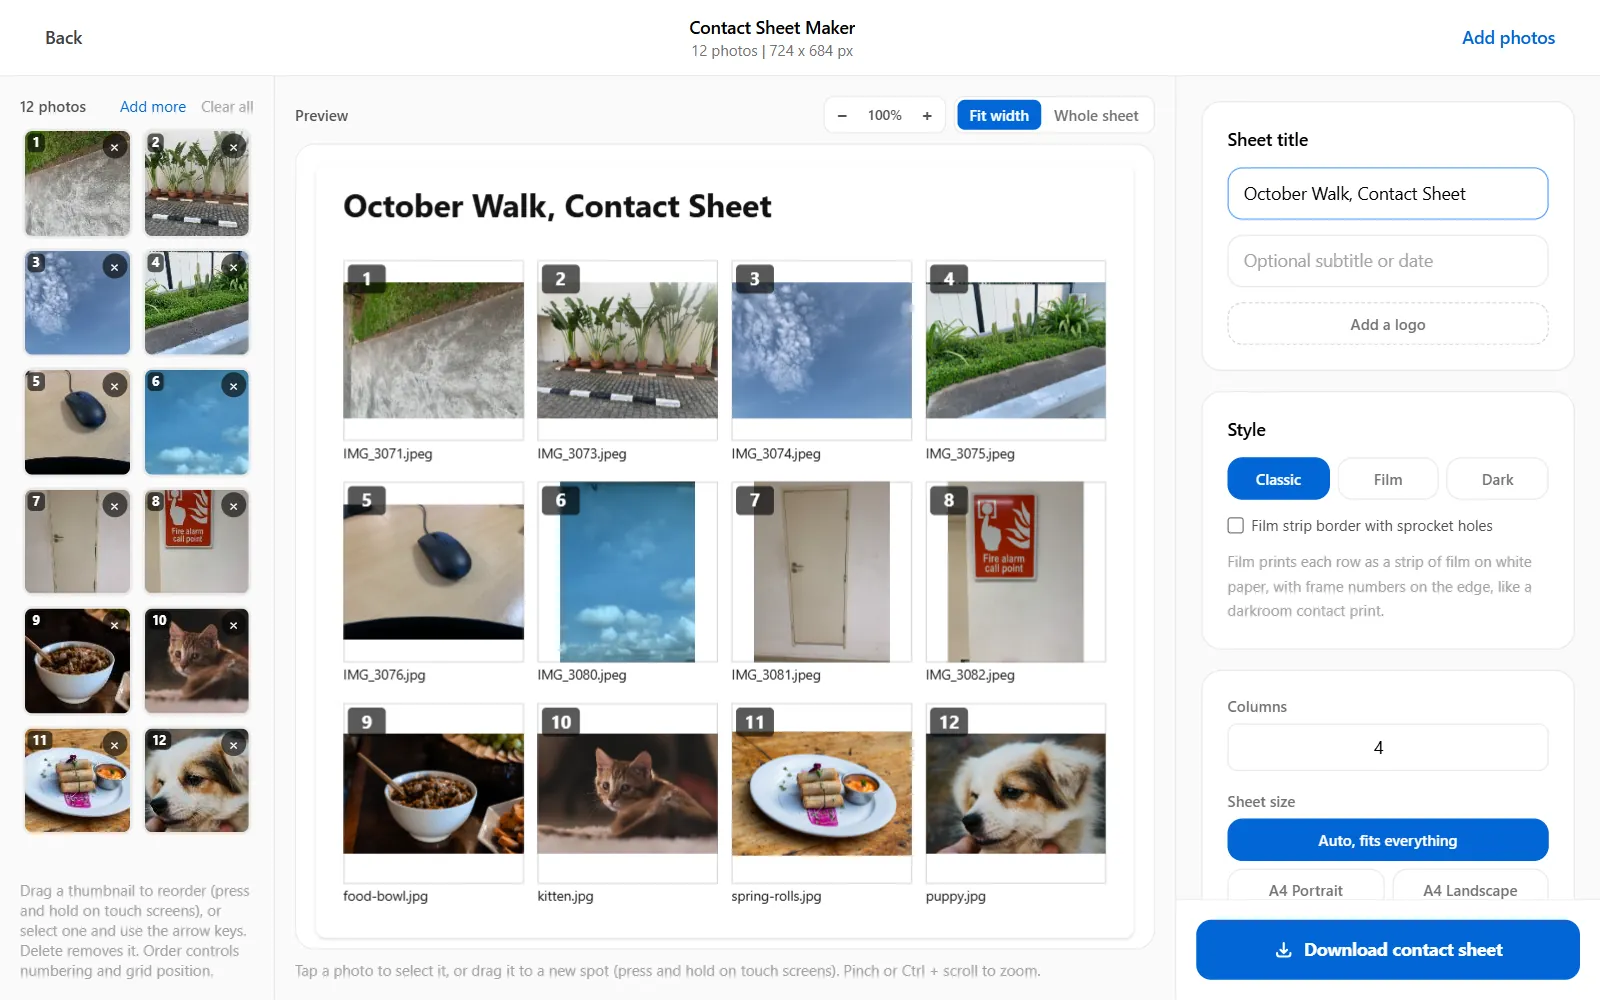
Step 2: Pick the layout and page size
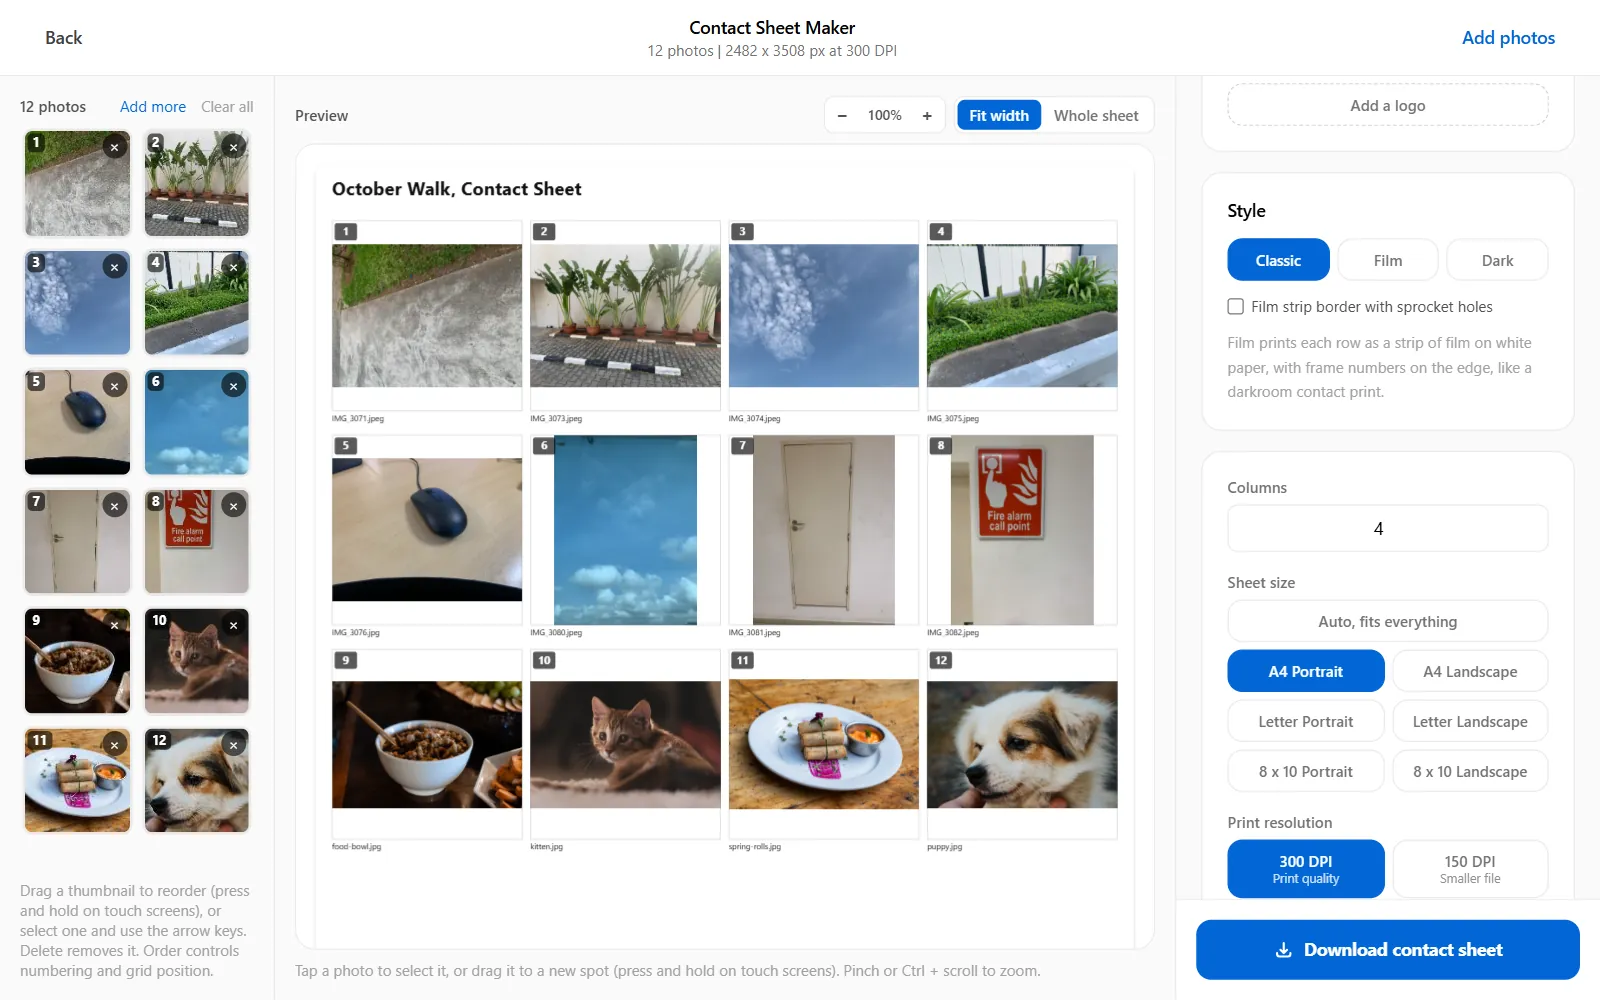
Set the number of columns, then choose a sheet size. Auto grows the sheet to fit every photo, which suits sharing on screen. For printing, pick A4, Letter or 8 x 10 in portrait or landscape. Print sizes export at 300 DPI by default, so an A4 sheet comes out at 2482 x 3508 pixels, with a 150 DPI option if you need a smaller file. If the photos don't fit on one page, they carry on to the next, numbered in order, with "Page 2 of 3" footers.
Step 3: Choose the labels
File names and numbers are on by default. You can also add each photo's dimensions and file size, or switch on camera details. Those add two caption lines read from the photo itself: the date and time it was taken with the camera model, then the aperture, shutter speed, ISO and focal length. That's handy when you're comparing exposures, or when a client wants to know which shots came from which session.
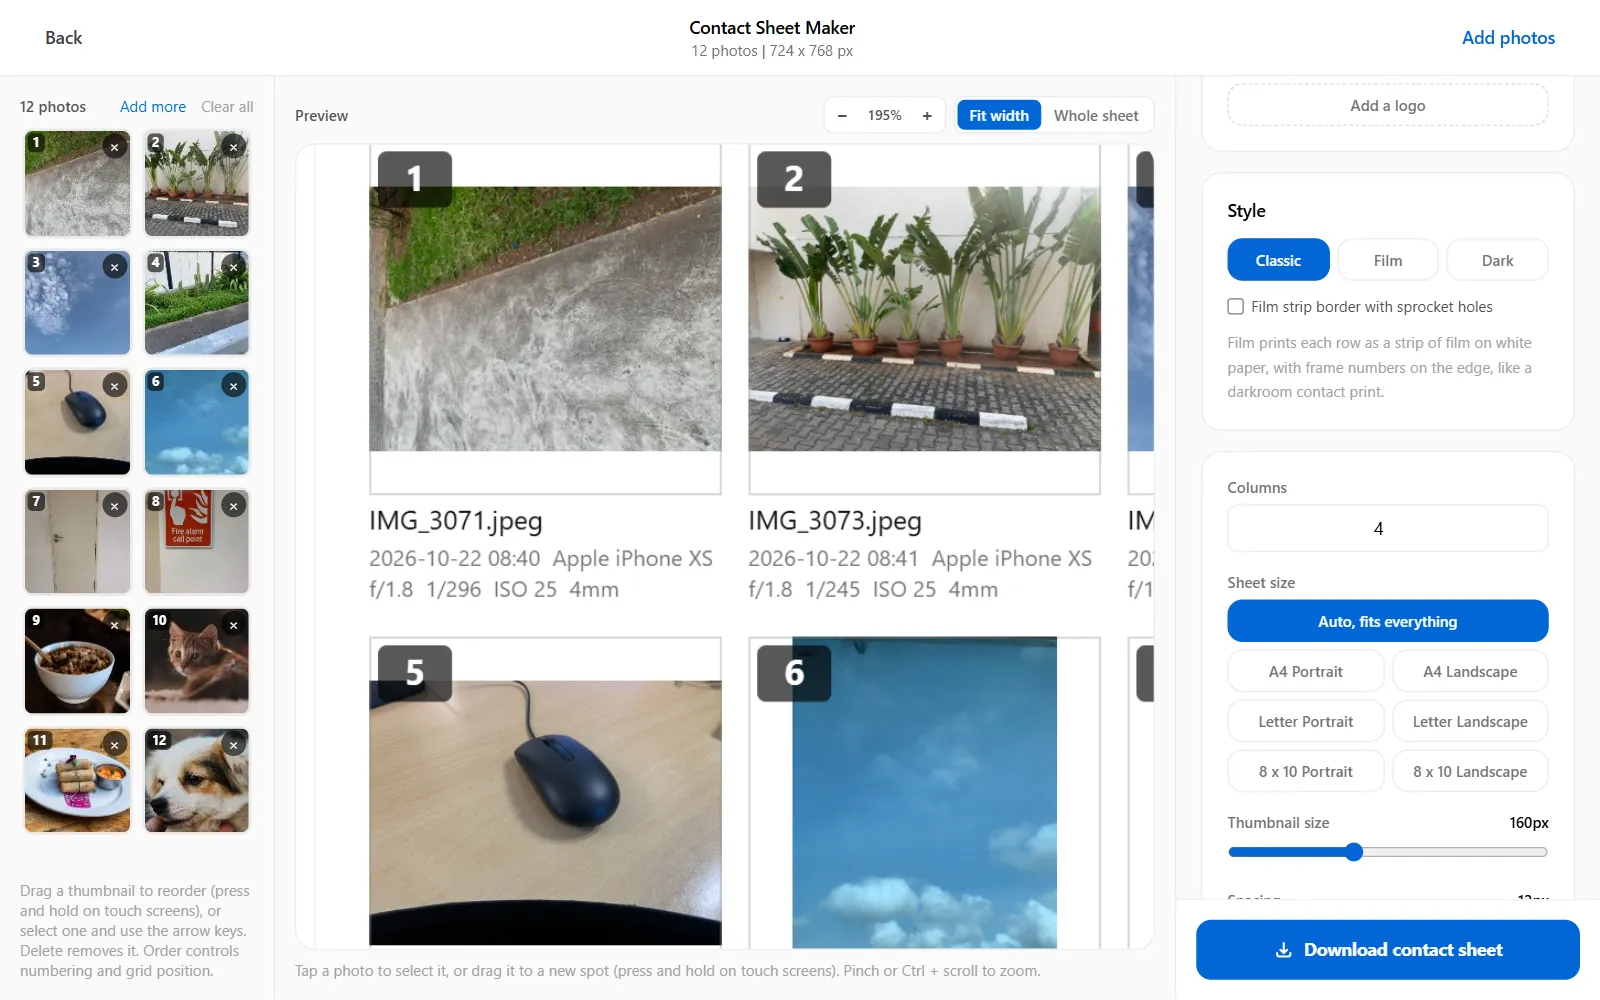
One catch: camera details only appear if the file still carries them. Screenshots, photos saved from messaging apps and many edited exports have had that data removed, so their captions stay blank. Use the original files from the camera or phone if you want them.
Step 4: Add a title, logo and style
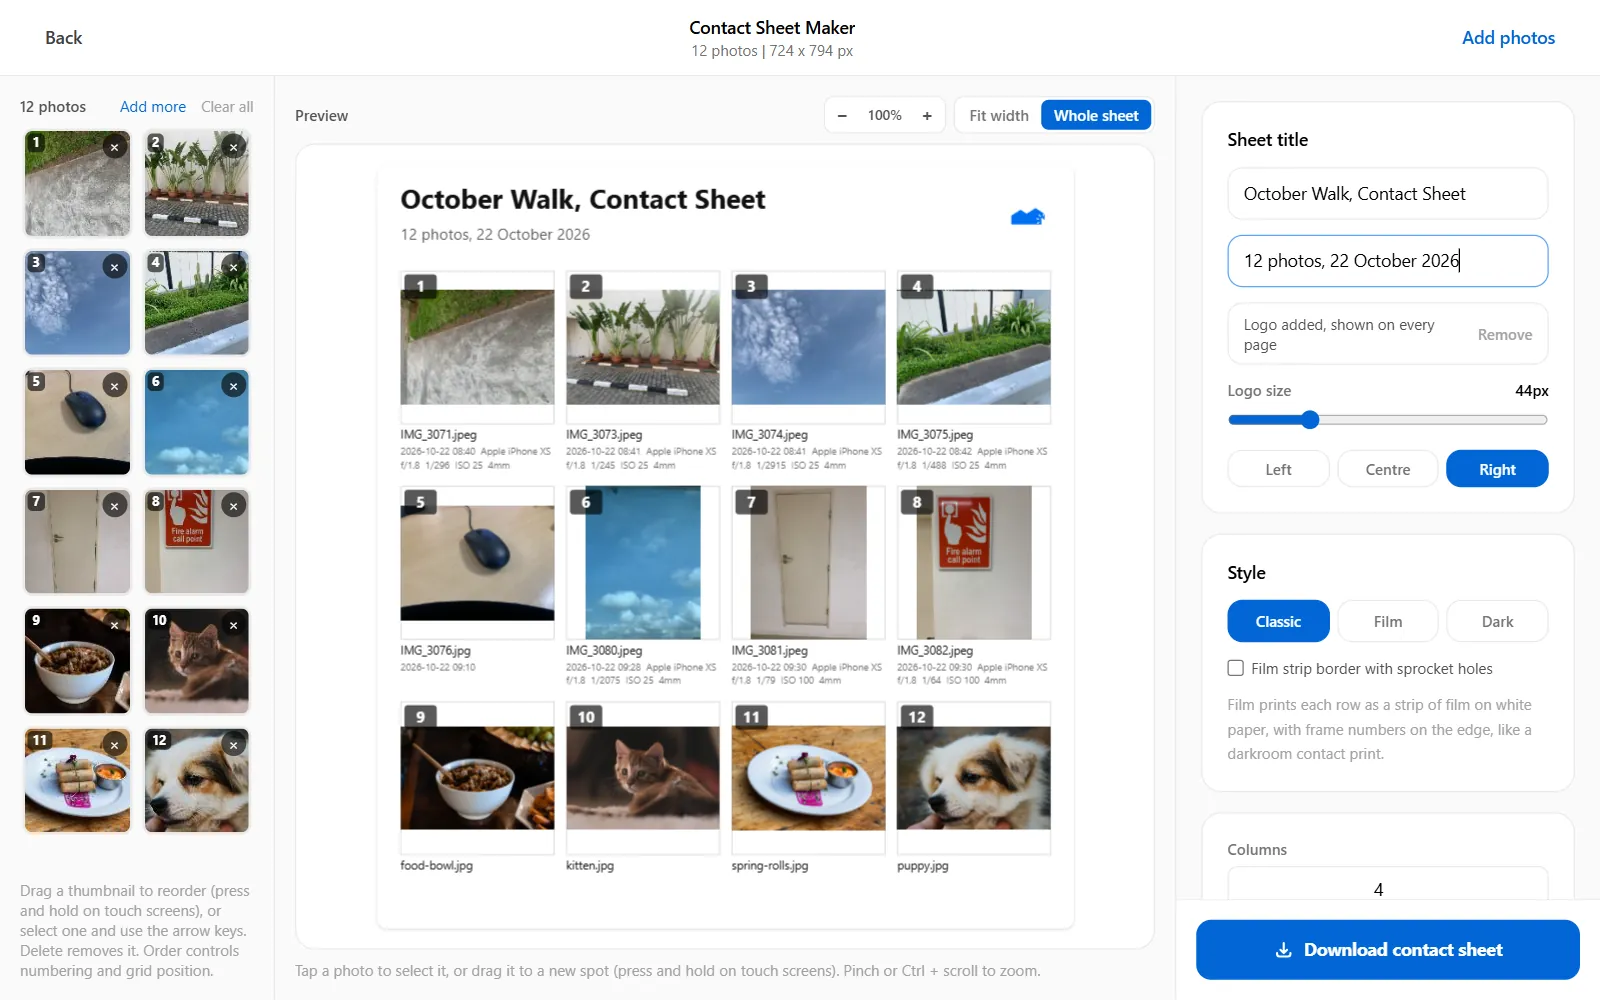
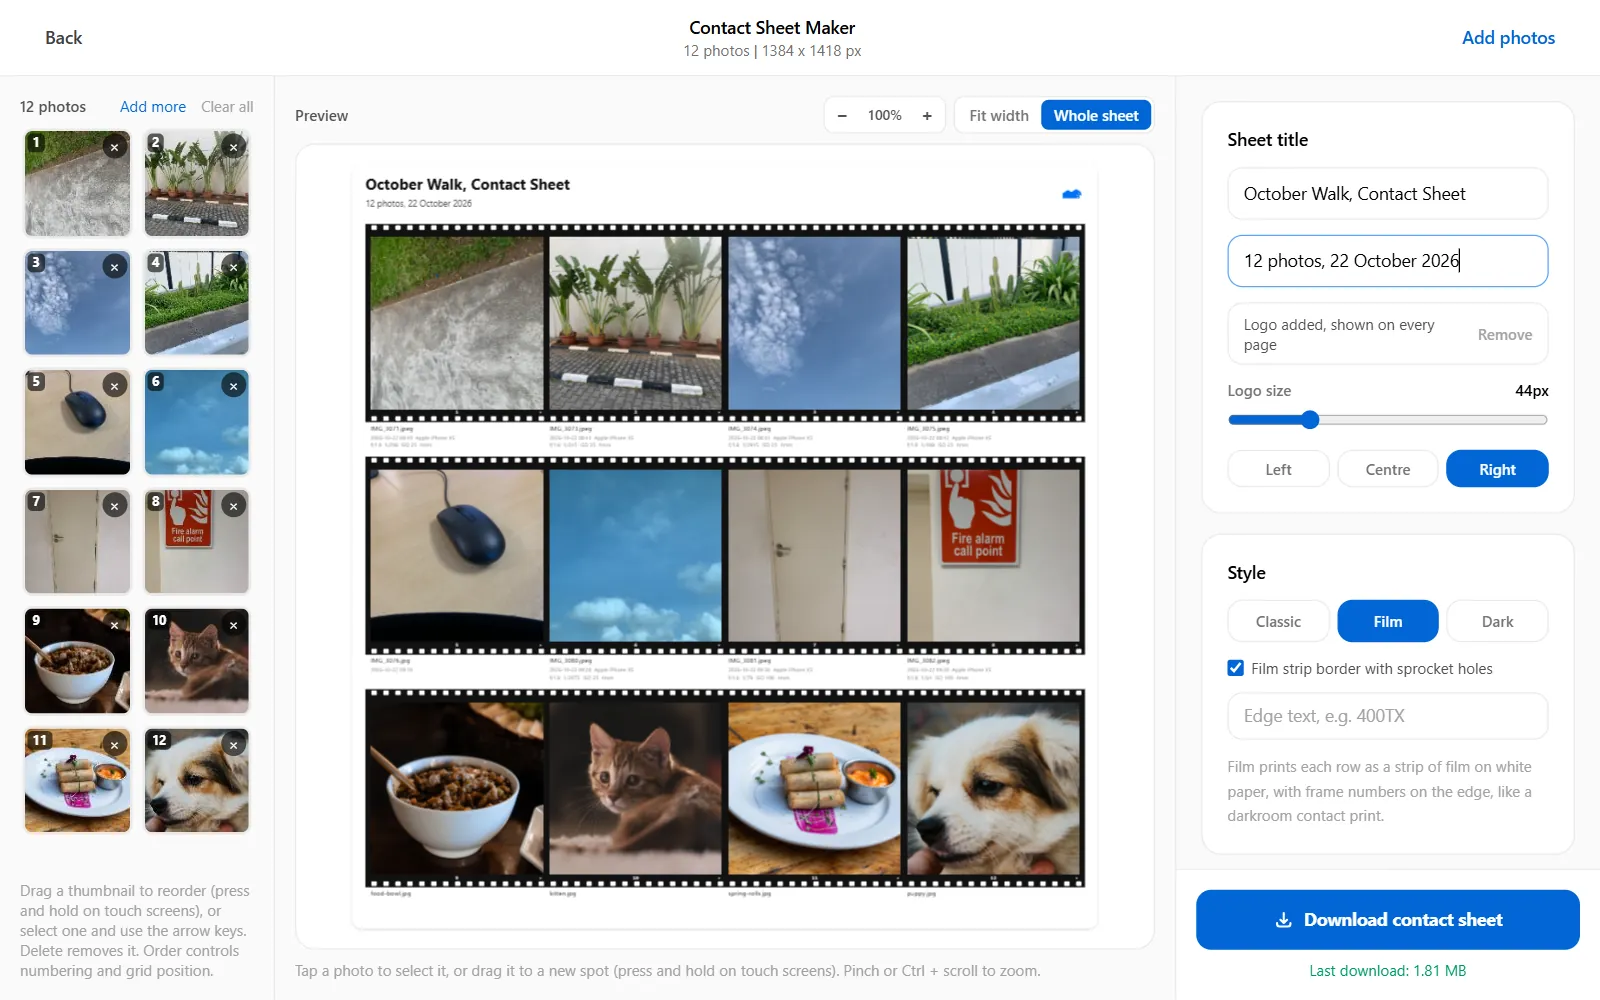
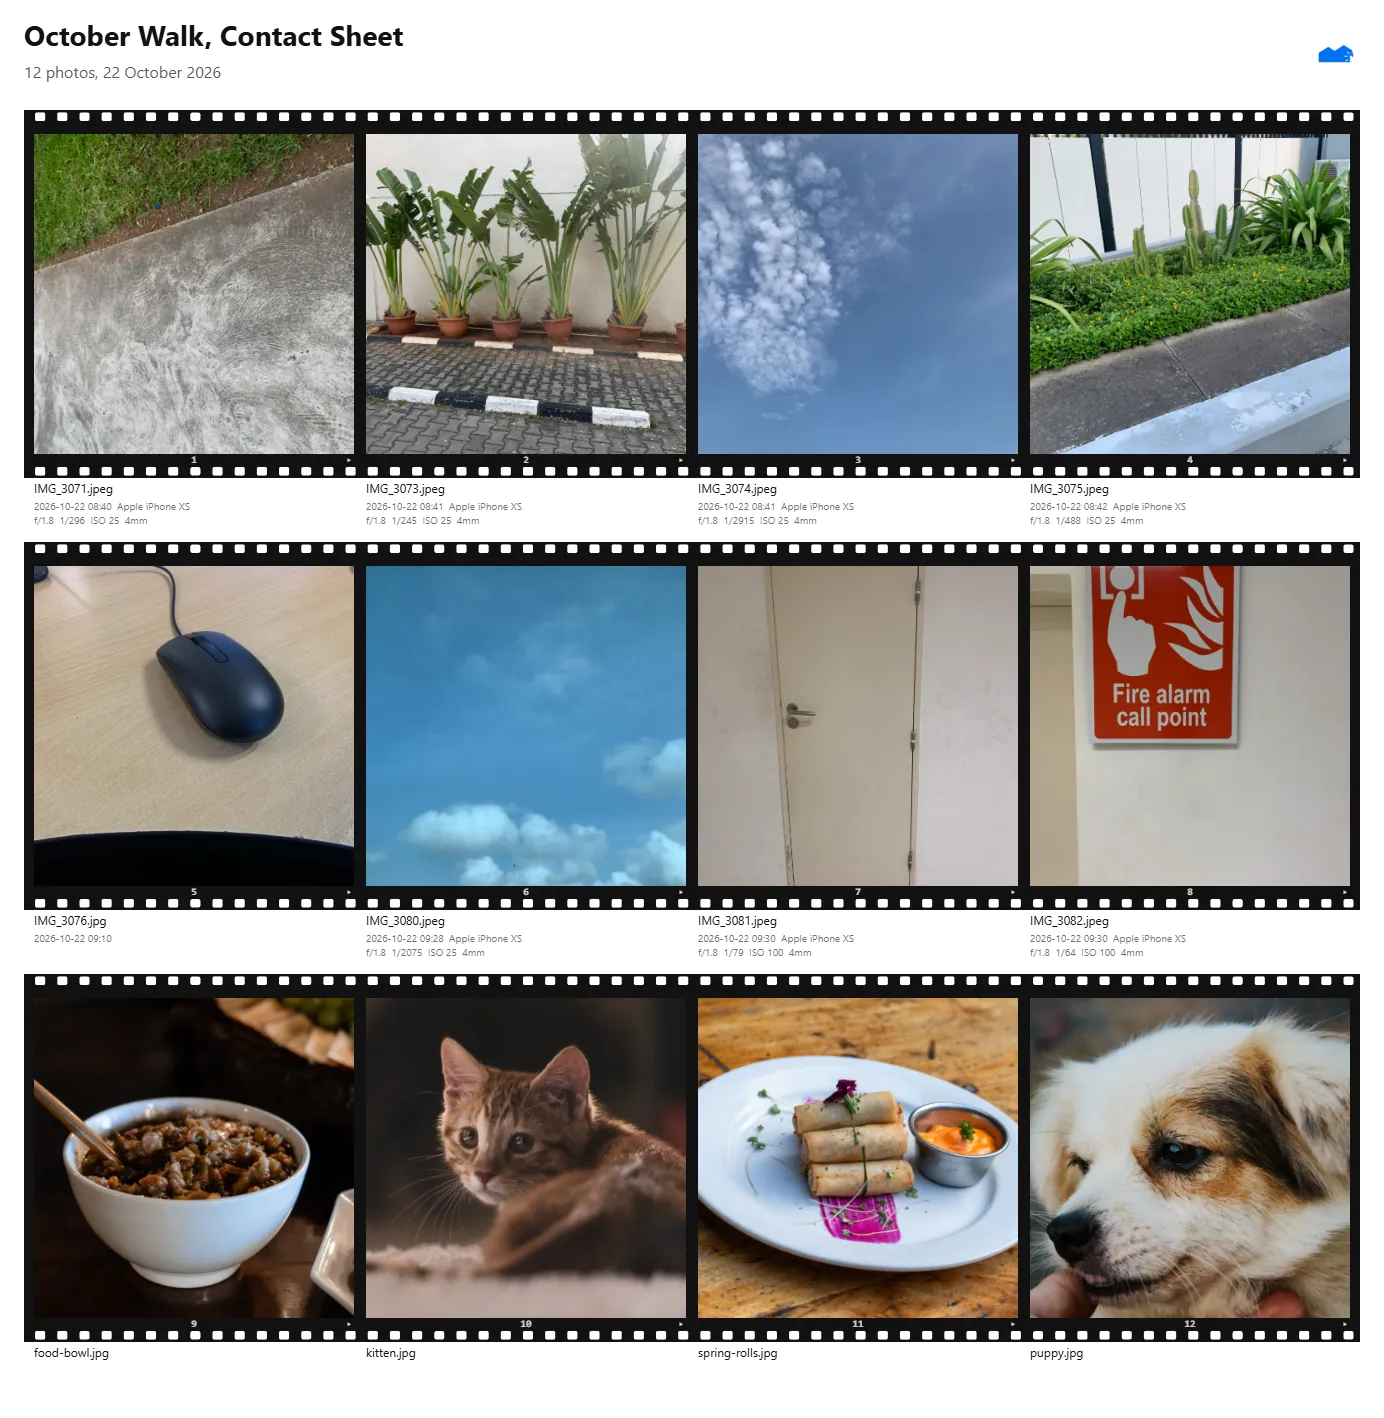
Give the sheet a title and an optional subtitle, such as the client name and shoot date. You can add a logo and place it on the left, center or right of the header. For the look, Classic is a clean white sheet. Film prints each row as a strip of film with sprocket holes and frame numbers, like a darkroom contact print, and you can add edge text such as a film stock name. Dark gives a plain black sheet.
Step 5: Download
Choose JPG, PNG, WebP or PDF and click Download contact sheet. PDF puts every page into one file at the exact paper size, which is the easiest thing to email or print. For printing an image file, pick JPG or PNG, because they store the 300 DPI setting and WebP can't. You can also set the background and text colors here, including a transparent background for PNG and WebP.
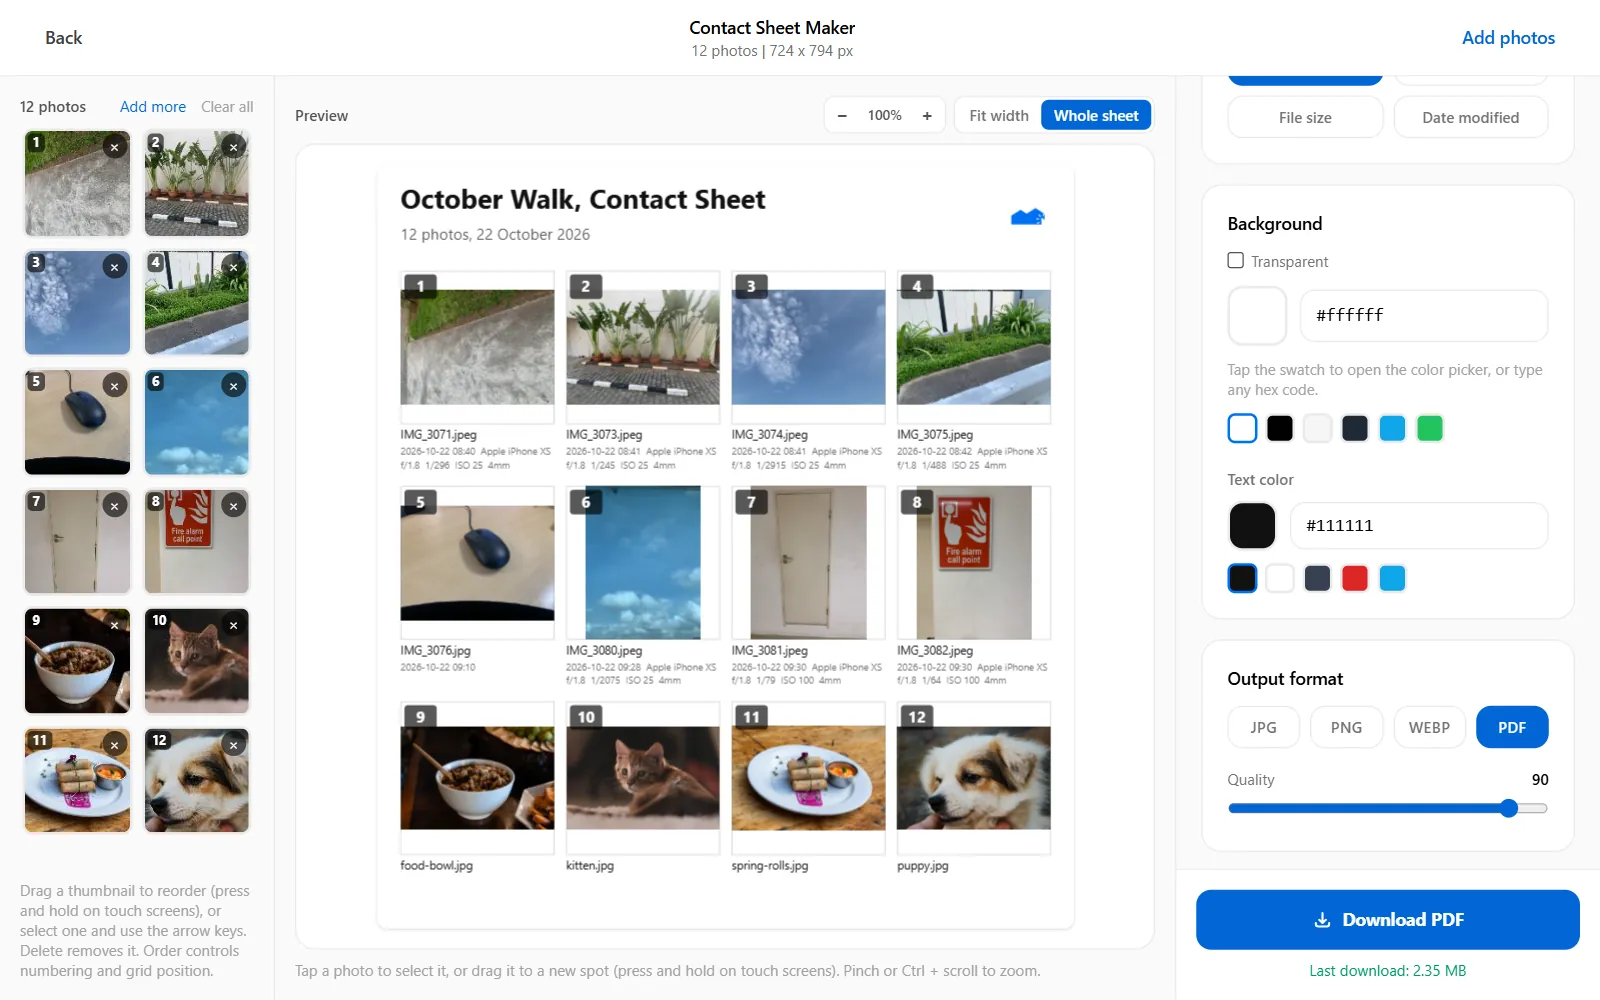
Here's what the finished sheet looks like, straight out of the tool:
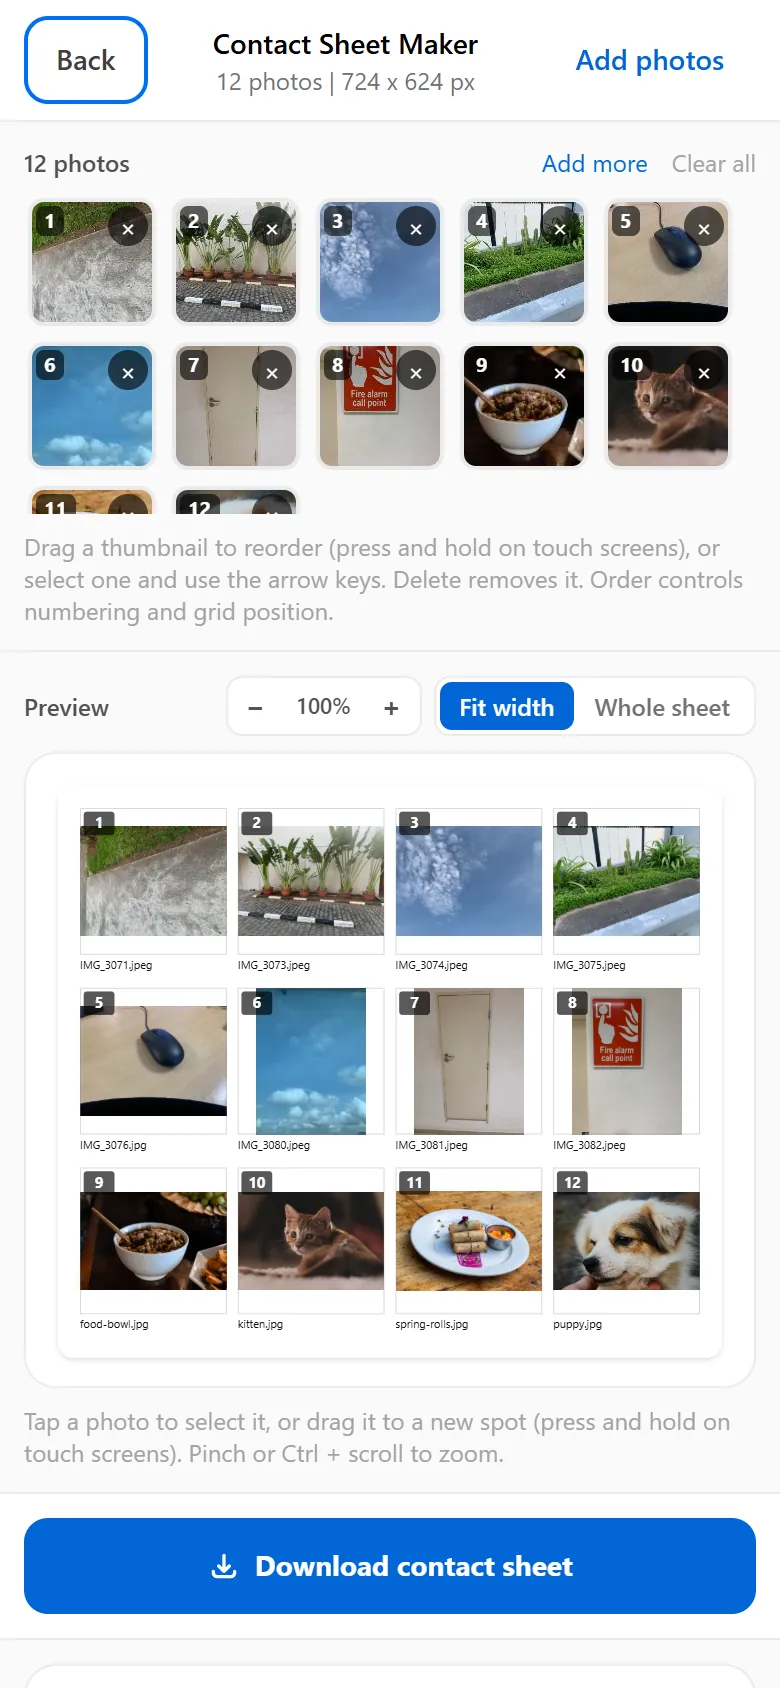
The same editor works on a phone. The photo list sits above the preview and the settings below, so you can build a sheet from your camera roll without moving files to a computer.
Method 2: Make a Contact Sheet in Photoshop
Photoshop has a built-in contact sheet tool called Contact Sheet II, available in Photoshop CS6 and later.
- Go to File > Automate > Contact Sheet II.
- Under Source Images, choose a folder, individual files or the documents you already have open.
- Set the document size, resolution and color mode, for example A4 at 300 pixels per inch.
- Set the number of columns and rows, and the spacing between thumbnails.
- Turn on Use Filename as Caption and pick a font and size.
- Click OK. Photoshop places the photos one by one and builds a new document, adding more pages if the photos don't fit on one.
You can also start from Adobe Bridge: select the photos, then choose Tools > Photoshop > Contact Sheet II.
The result is a normal Photoshop document, so you can edit it like any other, add a logo by hand and save it in whatever format you need. The limits are the captions, which are the file name or nothing, and the cost, since Photoshop is a paid subscription. Large folders also take a while, because Photoshop opens and places every image in turn.
Method 3: Make a Contact Sheet in Lightroom Classic
Lightroom Classic handles contact sheets in the Print module.
- In the Library module, select the photos. Putting them in a collection saves the selection for next time.
- Switch to the Print module.
- In the Template Browser, choose one of the contact sheet templates. They use the Single Image/Contact Sheet layout style, which prints every photo at the same size.
- Adjust the page setup, margins and cell spacing, and choose the text in the Page panel.
- Click Print, or in the Print Job panel, send the sheet to a JPEG file instead of a printer.
Lightroom gives you the most control over print layout of any method here, and it fits neatly into a workflow if your photos already live in your Lightroom catalog. It's also a paid subscription, and it only makes sense if you already use it. Importing a folder into Lightroom just to make one sheet is a lot of setup.
Method 4: Make a PDF Contact Sheet in Adobe Bridge
Adobe Bridge can make PDF contact sheets on its own, without Photoshop, from its Output workspace.
- Open the Output workspace (Window > Workspace > Output).
- In the Output Settings panel, choose a template. The default is a grid of 2 x 2 cells.
- Drag photos from the Content panel onto the canvas.
- Set the document, grid and margins, header and footer, and an optional watermark.
- Export the PDF.
Bridge is a free download with an Adobe account, so it's a decent option if you're already in the Adobe world but don't pay for Photoshop. It's still a desktop app to install, and it's built around PDF output rather than image files.
Method 5: Print a Contact Sheet on Mac or Windows
Both operating systems can print several photos per page with nothing extra installed. These are the quickest options when you only need a printed proof and don't care about labels or styling.
Mac: the Photos app
- Open Photos, click Library in the sidebar and select the photos.
- Choose File > Print.
- In the print options, choose the Contact Sheet format. You can resize the printed photos with this format.
- Choose a printer and click Print.
To save a PDF instead of printing, use the PDF menu in the macOS print dialog.
Windows: Print Pictures
- In File Explorer, select the photos.
- Right-click one of them and choose Print. On Windows 11 you may need to click Show more options first.
- In the Print Pictures window, choose the Contact sheet layout on the right.
- Choose a printer and print. To get a PDF, pick Microsoft Print to PDF as the printer.
These built-in tools are free and familiar, but they're print layouts, not contact sheet tools. You get small thumbnails and little say over the grid, labels or styling.
Which Method Should You Use?
| Method | Cost | What you need | Labels under photos | Output |
|---|---|---|---|---|
| ImgTweak (online) | Free | A browser, on a computer or phone | File name, number, size, camera details | JPG, PNG, WebP, PDF |
| Photoshop | Paid subscription | Desktop app | File name | Photoshop document, save as any format |
| Lightroom Classic | Paid subscription | Desktop app, photos in your catalog | Text options in the Page panel | Printer or JPEG file |
| Adobe Bridge | Free with an Adobe account | Desktop app | Header and footer | |
| Photos (Mac) | Free, built in | A Mac | Few or none | Printer or PDF |
| Print Pictures (Windows) | Free, built in | A Windows PC | Few or none | Printer or PDF |
If you already pay for Lightroom and your photos are in it, use Lightroom. If you want a sheet you can keep editing as a layered file, Photoshop is the better fit. For a quick printed proof, the built-in Mac and Windows options are fine. If you just need a clean, labeled sheet to send someone today, the free contact sheet maker is the shortest path from a folder of photos to a PDF in their inbox.
Common Contact Sheet Mistakes
Cropping every photo to a square. It makes a tidy grid and hides the edges of each frame, which is often where the problem is. Keep photos uncropped for review, and only crop for a sheet that's purely decorative.
Leaving out the numbers. Without them, feedback turns into "the third one in the second row, no, the other one". Numbers cost nothing and save a round of emails.
Too many photos per page. A 10 x 10 grid on A4 makes each thumbnail about 2 centimeters wide. That's fine for an archive index and useless for choosing between two similar expressions. For picking favorites, four or five columns on A4 is a good starting point.
Expecting camera details from screenshots or messaging app photos. Those files have usually had the camera data removed. Use the originals.
Printing a WebP sheet. WebP can't store a print resolution, so print software may scale it oddly. Export JPG, PNG or PDF for anything that's going to paper.
FAQ
What is a contact sheet used for?
Reviewing a batch of photos at a glance. Photographers send them to clients to choose favorites, editors use them to compare similar shots, schools and agencies use them for portfolios and archives, and anyone with a big folder can use one as a printed index.
Can I make a contact sheet without Photoshop?
Yes. A browser-based contact sheet maker needs no install and works on a phone too. Adobe Bridge, Photos on a Mac and Print Pictures on Windows are other free options, though they offer fewer labels and layout choices.
How many photos should go on one contact sheet?
For choosing favorites, 12 to 30 photos per A4 or Letter page keeps thumbnails large enough to judge. For an archive index, you can fit far more, since you only need to recognize each image.
What resolution should a contact sheet be for printing?
300 DPI is standard for print. An A4 sheet at 300 DPI is 2482 x 3508 pixels, and a US Letter sheet is 2550 x 3300 pixels.
Can a contact sheet show the date and camera settings?
Yes, if the photos still have their camera data. In ImgTweak, turn on Show camera details and each thumbnail gets the date taken, camera model, aperture, shutter speed, ISO and focal length.
Make Yours
Pick the method that matches the software you already have, and keep every photo uncropped and numbered. To try it now, drop a folder into the contact sheet maker and download the PDF: if every photo is there, numbered in the order you set, you're done.
Want to know what's stored inside your photos before you send them? What is EXIF data explains the camera data those captions come from, and how to convert HEIC to JPG covers iPhone photos for apps that won't open them.
Some sample photos: Pexels.
Related articles
What Is EXIF Data and Should You Remove It Before Sharing Photos
Every photo you take stores hidden data you never see: GPS coordinates, device model, timestamps, and more.
ReadHow to Convert HEIC to JPG
HEIC photos from your iPhone will not open on Windows and will not upload to most portals. Here is how to convert them with no upload.
ReadBrowser-Based Image Compression: Why It's Better Than Online Upload Tools
Discover why browser-based image compression is faster, more private, and more secure than traditional upload tools.
Read